Squeezing Performance out of Microsoft Power Automate #3
In my previous post I covered how there are numerous actions within Power Automate that in fact are just providing a user interface for public API calls within the Office 365 environment. This provides some extra room for optimization, as the user interface doesn't tend to cover all the API calls that are available, as we saw in the case of Dynamics 365, for instance.
In this post I will cover a feature that's fairly new - implementing so-called Custom Connectors, but using C# code! You'll find the relevant Microsoft support article here.
Background
Custom Connectors by themselves aren't new - designed to easily drop-in an API of your choice into your automation flows. These connectors can be shared with a team, updated on the fly and support all features that the built-in connectors offer as well, including the definition of triggers.
One of the main curiosities that struck me was that while Power Automate was very powerful at performing more complicated tasks, sometimes the simple ones were lacking completely. Some simple examples:
- There is no expression for determining the
indexof an object within an array. Goodbye efficient CSV parsing! 😒 - No support for hashing mechanisms of any kind. This makes simple tasks like comparing files / payloads unnecessarily complicated and slow.
- No support for random string generation.
While the internet is full of convoluted "workarounds", I wanted to solve this in a more efficient manner. Any potential solution had to fulfill two key criteria:
- It has to be re-usable - I don't want to convolute the automation flow in any way by littering it with Compose and Variable actions etc.
- It has to be efficient - the execution of the flow must not be impacted in any significant way.
Attempt #1
My first idea was to build an API of my own with re-usable functions that could be executed using a HTTP request. Power Automate has a premium trigger for this very purpose. I created three functions for testing purposes: strand (random string generation), indexOf (array indexing) and pretty (case correction).
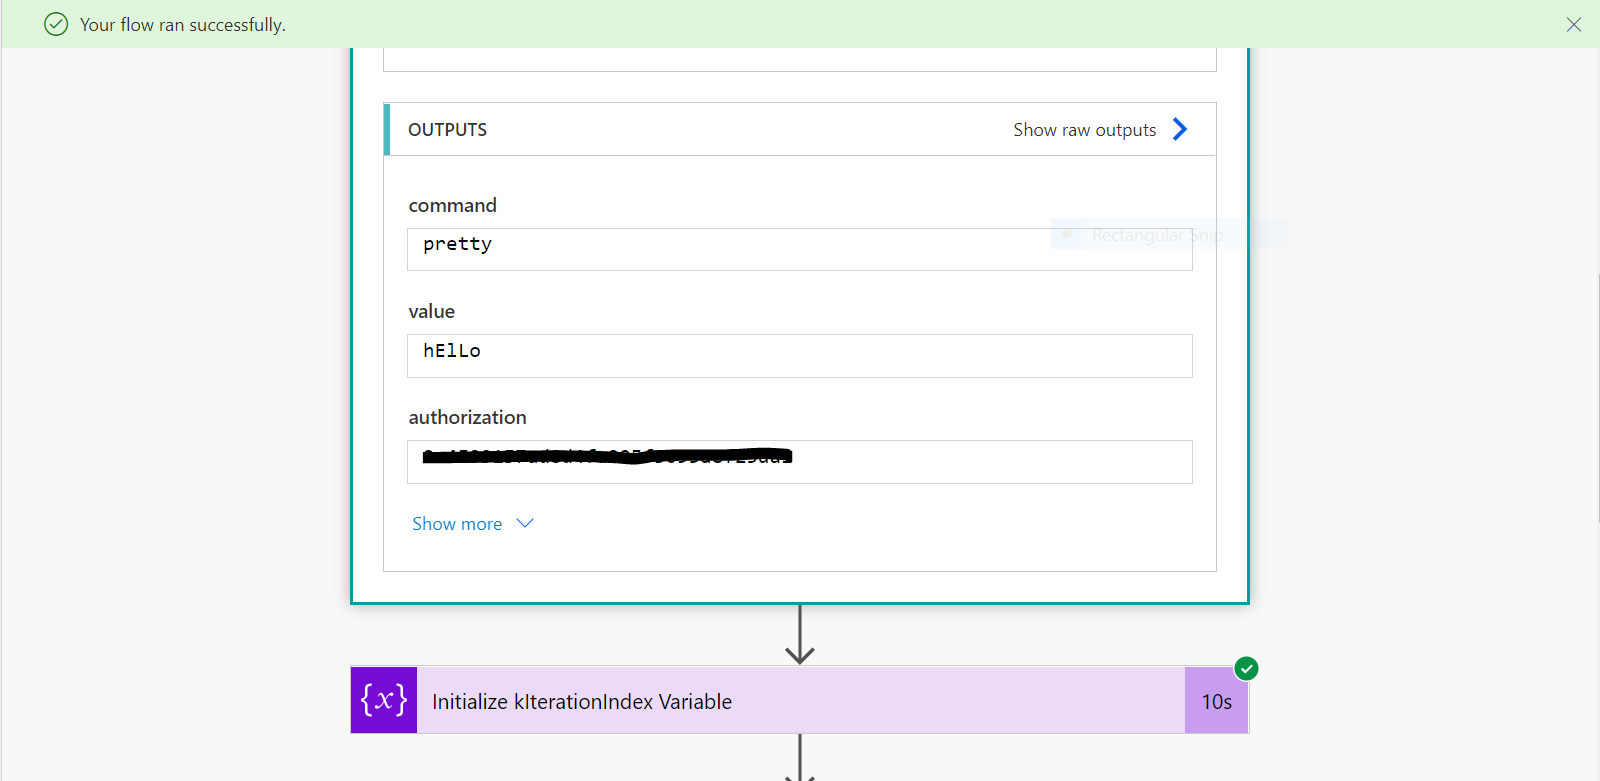
The API works via a POST call and contains a JSON payload in its body, which is in turn evaluated by the Flow:
{
	"command" : "strand",
	"value" : "30",
	"authorization" : "098f6bcd4621d373cade4e832627b4f6"
}
In theory, this approach should work fine, but in practice it proved to be unreliable. For one, response times fluctuated with no discernible pattern, such as shown in the example below:
Secondly, even the API was just executing workarounds rather than introducing new native functions. In the case of indexOf for instance, it achieved this by splitting the comma separated string passed by the API and then looping through its entire contents (since without a workaround you also cannot terminate an Apply to Each mid-execution).
Bottom line - reusable ish, not efficient.
Attempt #2
As mentioned earlier, Custom Connectors are first and foremost designed to easily drop-in an API of your choice into your automation flows. A recent new feature that struck me however as very interesting is the ability to drop-in custom C# code into your connector, which allows you to leverage the power of C# with the local processing power of the server(s) that run the Power Automate platform itself. Neat!
Before getting too excited, this feature has several restrictions that you should keep in mind:
- Your code must be written in C#, have a maximum execution time of 5 seconds, and can’t be more than 1MB in size.
- You can't import your own namespaces and the list of supported namespaces is limited - the full list can be found here.
So to cut to the chase, it is actually possible to create a Connector that talks to a "dummy" API while letting you intercept all requests it makes via custom, locally executed C# code, returning the results in a de-facto "fake" web request.
Creating the Connector
In the Power Automate sidebar, head to Data -> Custom Connectors. Click on "New" and decide on a name for your connector. This will be the name that will be shown during Flow creation when an end-user is browsing the list of available connectors.
Next, enter a description and change the connector's icon, if desired. Under "Scheme" select HTTP, followed by entering logiqapps.com under "Host" and / under "Base URL". Click on the "Next" link.
Under "Security", choose "No Authentication" and continue to "Definition". The "Definitions" screen is where you can define the features that your connector will offer.
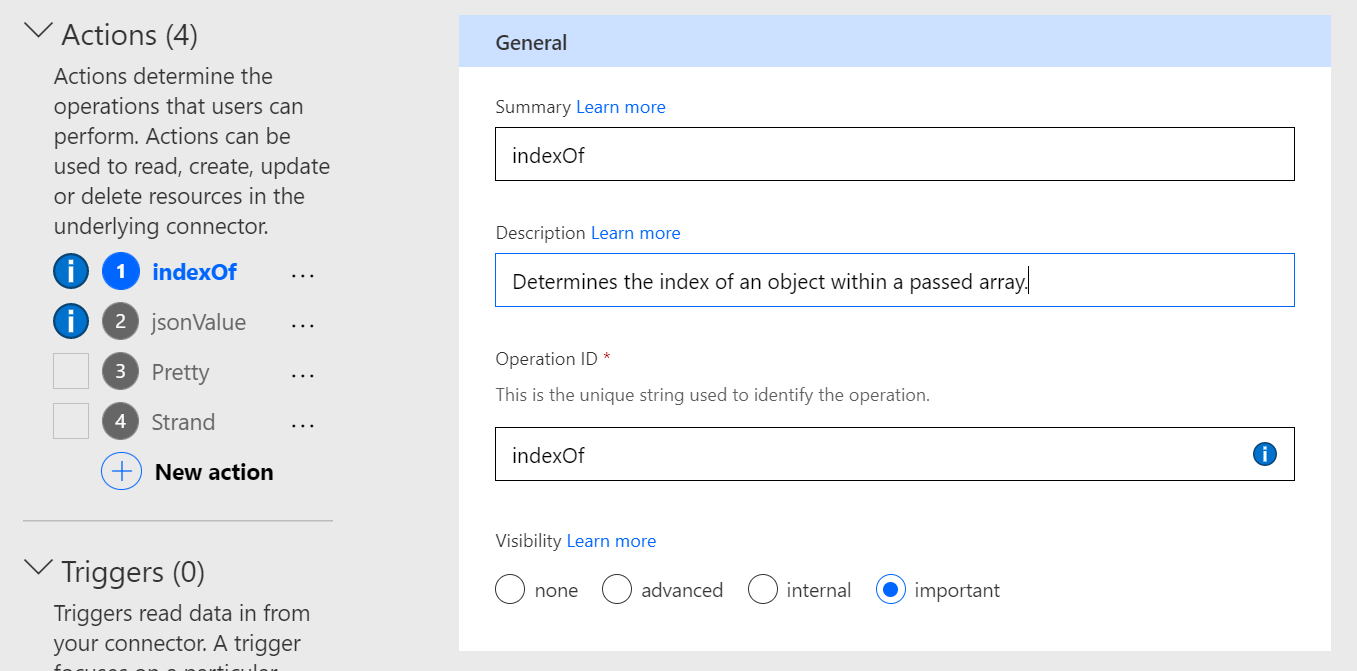
To add your first action, click on "New Action" and provide a summary, description as well as a so-called operation ID. Make special note of the operation ID - you will need it when creating your C# code. The field Visibility has the following meanings:
importantoperations and parameters are always shown to the user first.advancedoperations and parameters are hidden under an additional menu.internaloperations and parameters are hidden from the user.
Once you have added your action(s), scroll down to "Request" and click on "Import from Sample". Once again, we will need to input dummy data, so set the "Verb" value to GET and for the URL enter http://logiqapps.com/api2. Keep in mind that this URL has to be unique for each action, so get creative!
The last step is to edit the so called "Swagger" file, which is a standard used to describe and document RESTful APIs. Power Automate generates this file by default as you are adding your custom action(s), but in order to ask the person that is using your connector for some input(s), we will need to modify the Swagger file.
Look for your action's name in the code and search for the "parameters" key. This is the place where you will define the input fields that will be presented to the person using your Connector's action. In my case below I have two fields:
arrayValue- Contains the raw value of the array that is to be searched.objectToSearch- The object to return the array index for.
Again, make special note of each input's name: value - you will need it in your C# script later.
parameters:
- {name: arrayValue, default: '', in: query, type: string, required: true, x-ms-visibility: important}
- {name: objectToSearch, default: '', in: query, type: string, required: true, x-ms-visibility: important}Now we are ready for the fun part - coding the connector's functionality in C#. Click on "Code (Preview)" and toggle the checkbox "Code Enabled"
Understanding the Flow
Your script is a subclass of ScriptBase with an entry point at ExecuteAsync(). Power Automate expects to receive an instance of HTTPResponseMessage back, containing a HTTP code indicating success / failure, as well as a JSON body containing your results.
In the sample below I am evaluating which operation the Connector's user would like my script to perform using a switch statement on this.Context.OperationId, which returns the OperationID you defined earlier when adding your action(s) in the "Definitions" screen.
If an invalid OperationID is passed, I manually create an instance of HTTPResponseMessage that indicates that the request was invalid and return it to Power Automate. At this point, the end-user would be shown an error message in the Flow editor.
public class Script : ScriptBase
{
	/* Initialization */
    public override async Task<HttpResponseMessage> ExecuteAsync()
    {
	switch (this.Context.OperationId)
	{
		case "indexOf":
		{
			return await this.HandleIndexOfOperation().ConfigureAwait(false);
				break;
		}
	}

	/* at this point we have an invalid request */
	HttpResponseMessage _errorResponse = new HttpResponseMessage(HttpStatusCode.BadRequest);

	return _errorResponse;
}Next, I implement the function HandleIndexOfOperation(). The function converts the string equivalent of the passed array to an array object and then uses native functions within the System namespace to determine the index.
Earlier when creating the Swagger file, we defined some fields that the end-user can use to provide additional information to our connector - to now obtain these values, you may use the Uri.UnescapeDataString(queryString.First(x => x.Key == "objectToSearch").Value); call, replacing objectToSearch with the name of your field.
Connector Policies (to be covered in the next post) or the C# function replace.Below you will find the implementation of my indexOf function:
/* Function: indexOf */
private async Task<HttpResponseMessage> HandleIndexOfOperation()
{
	HttpResponseMessage response = new HttpResponseMessage(HttpStatusCode.OK);

	var queryString = ParseQueryString(this.Context.Request.RequestUri);
	var arrayValue = Uri.UnescapeDataString(queryString.First(x => x.Key == "arrayValue").Value).Replace("\"","").Replace("[","").Replace("]","").Split(new string[] { "," }, StringSplitOptions.None);
	var objectToSearch = Uri.UnescapeDataString(queryString.First(x => x.Key == "objectToSearch").Value);

	int objectIndex = -1;

	if (Array.Exists(arrayValue, element => element == objectToSearch))
	{
		objectIndex = Array.IndexOf(arrayValue,objectToSearch);
	}

	var responseContent = new JObject
	{
		["returnedIndex"] = objectIndex,
		["receivedValue"] = String.Join(",", arrayValue)
	};

	response.Content = CreateJsonContent(responseContent.ToString());

	return response;
}
To ensure that the code in this post will compile properly, you will also need to add the following namespaces to the top of your file:
using System.Security.Cryptography;
using System;
using System.Collections.Generic;
using System.Linq;
using System.Net;
using System.Net.Http;
using System.Text;
using System.Text.RegularExpressions;
using System.Threading.Tasks;
using Newtonsoft.Json.Linq;
using System.IO;
Lastly, click on "Update Connector" and wait for the code to compile. This process can take up to one minute, so be patient.
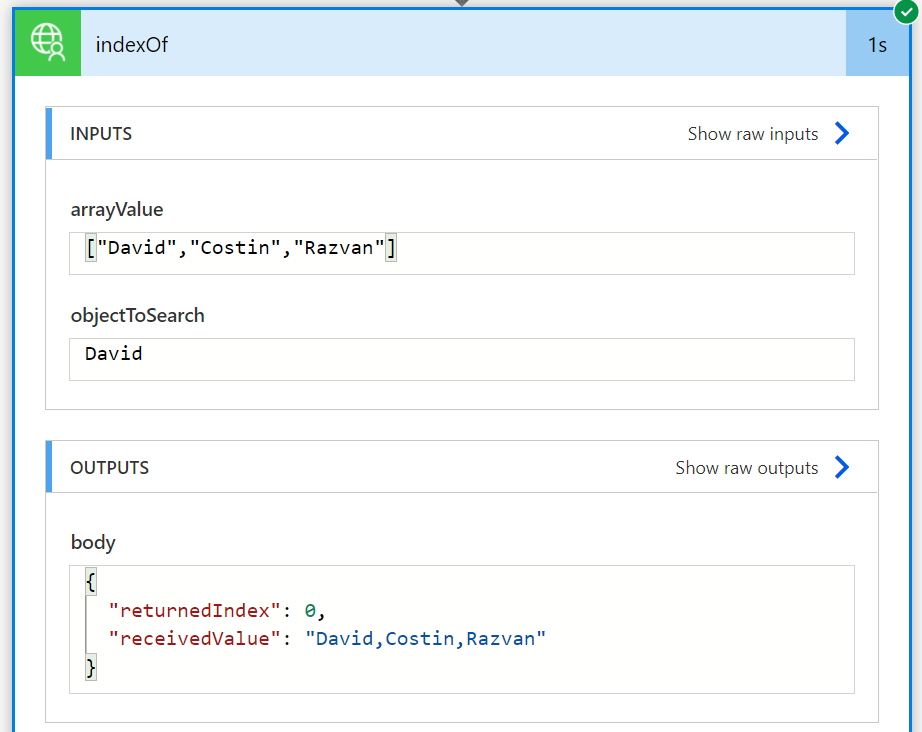
Testing the Connector
After inserting the connector into a new Flow and running it, I received a response in 35 milliseconds (!!) according to the run history - that's some fine optimization going on right there.
Wrapping Up
Good automations work exactly as described on the tin. Great automations go the extra mile when it comes to efficiency, reliability and maintenance cost. In this third post we covered Custom Connectors and their unofficial ability to execute native C# code directly on hardware, providing almost unlimited potential for adding missing functions and features that Power Automate isn't able to natively perform.